Product List
Software Testing
Please download Test resources to test & compare Moyea SWF To Video Converters with other SWF converters!
1. Music flash controlled by script:
Download Beautiful.swf
2. Interactive game flash:
Download GangsterPursuit.swf
Download CrusaderTrank.swf
More test resources and info...
In computer graphic processing, especially in Adobe Photoshop, a color image file is composed of one or more channels, and each channel contains the color information of the image. The 3 basic channels are: RGB for red, for green and for blue. There is a necessity and importance to find a word to describe the transparent channel, and this transparent channel is called alpha channel. It is always taken for granted that the alpha channel is a "non-color" channel.
Video with alpha channel is a common word in Adobe Premiere. It is with the advantage of video blending. You can composite a video by blending a video and a video with alpha. The result will be that one video shows above the other without covering it.
How to convert SWF to Video AVI with alpha channel?
Here is a SWF to video converter highly recommended: Moyea SWF to Video Converter Pro. It is a professional tool to convert SWF to video, and is the unique conversion tool in the world that supports the conversion of SWF to AVI with alpha. Yet, with its easy-to-use and clear interfaces, it is simple and easy to manipulate.
Launch the software, please download from: https://new.swfkits.com/swf_to_video/
1. Input the Flash Files:
Click "Browse…" tab to input the flash files from your computer folder. Click "V" immediately behind, a drop list will cascade automatically. Choose among "From Folder","From IE cache" and"Flash Projector", and there will be a dialog box accordingly pops up. Choose the file in those dialog boxes and click"OK". On the right of the pane are the properties of the current playing flash.
Tips: On opening the window, you will get the Single Mode conversion, if you have many a file to input, you are suggested to choose the"Batch Mode" on the top left.
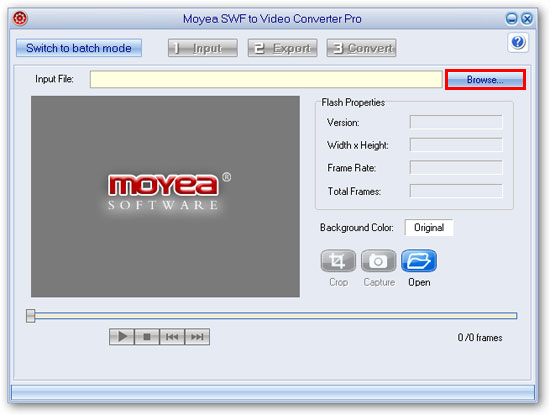
check the flash files
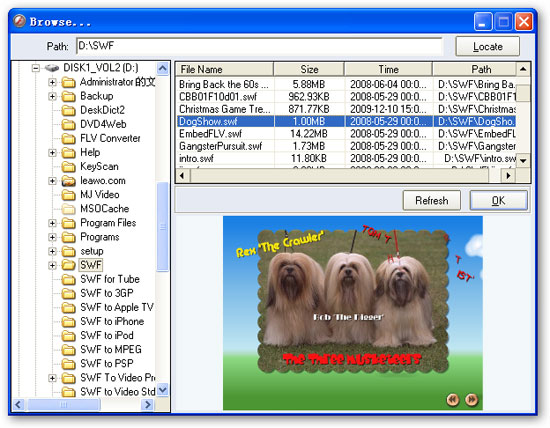
Capture Pictures
Click the"Original" in the Background Color box, there will pop up a pigment pane, you can select one color or just DIY a color for your video background. Click the"Capture" tab to capture a picture of the playing flash, and the image files are saved as JPEG format files. Click "Open" on the right to check for its saving folder. You can click the button continuously for pictures, and check them together. Click"Crop" in the menu to crop the video.
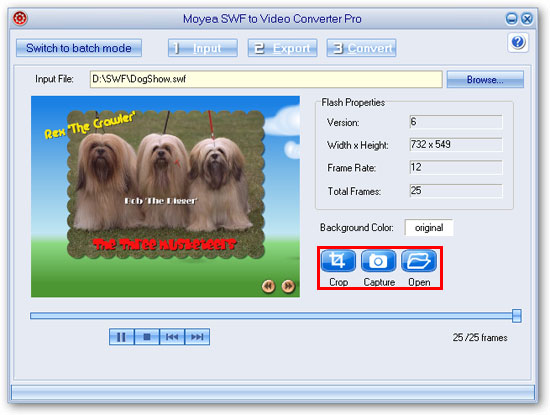
2. Crop the Video
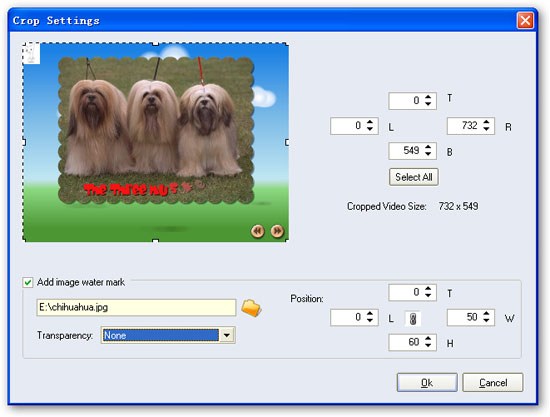
Click the button "Crop" and the following interface will pop up.
Crop the video. Crop the video size by changing the values on the right of the pane. Choose"Select All", and the video will keep the original size. Or simply move your mouse cursor on the video pane to make it.
Tips:
a. Add image water mark.Check the"Add image water mark" box to add an image to the video. Click"Folder" immediately behind to browse for the image from your folder. Click"None" in the box to set the transparency of your image."None" is for no editing, and on clicking"Select…" , there will be a dialog box pops up automatically.
b. Edit the image. Set the RGB values to DIY a color, showing in the bar below. Drag the tolerance bar, you can easily get the picture altered in pixel; drag the Alpha bar to adjust the opacity of the picture. Click"OK" to continue.
c. Set the image position. Place the position of your image by changing the values on the right side. Click the lock in the core, and you can set one certain value without changing other values.
3. Export
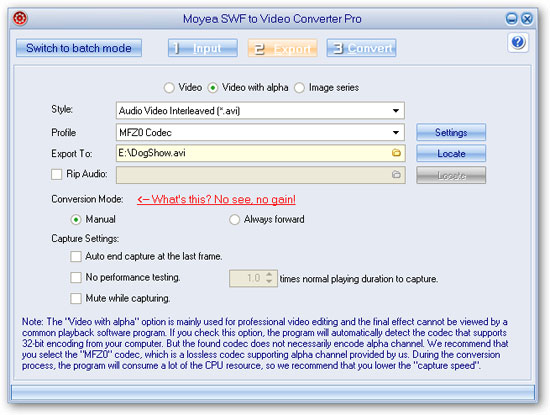
Click"Export" tab in the menu, and you will get the following window.
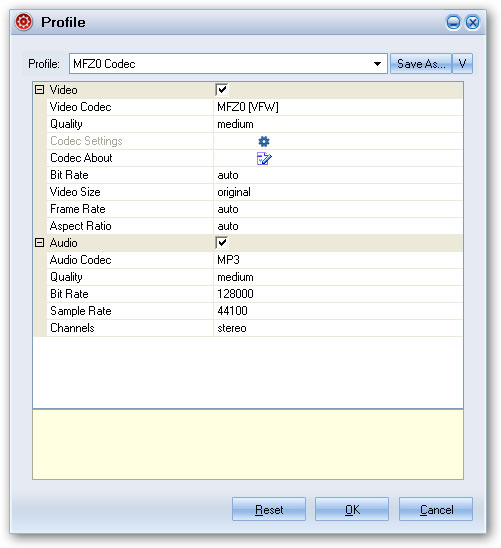
① Profile selection.Click "AVI—Audio Video Interleaved (*.avi )" under the" Profile", and a drop list will cascade. Select"AVI with Alpha" from it.
Tips:On choosing your export file format from the drop list, the table on the right will change in accord. Change the video and audio parameters by clicking each item and selecting the value. Click"Save as" immediately after the box to save the profile you set as a new one. Click"V", you can save, rename, or delete the newly set.
② Set the export destination folder. Click the folder in the"Export to" box to set the output destination, and click the"Locate" button, the destination folder will pop up immediately.
③ Rip the audio. Check the"Rip Audio" box, and the audio will be extracted and generated as a single file. Click the"folder" on the right to browse for the audio destination folder, and click the"Locate" button, the destination folder will pop up itself.
Select conversion mode.Click the in the Conversion Mode box to decide the conversion mode. By selecting"Manual", you can interact in the conversion process by setting the capture start and end points while selecting"Automatic" mode, the conversion will process automatically.
Note: The manual mode conversion can help guarantee a better result. It is highly recommended for the interactive or Ascript controlled flashes with few frames.
Click the"Convert" tab in the menu to convert the files.
4. Conversion. Click "Convert" tab in menu, there will be an interface for your converting. On the interface, there will be several buttons: Option, Play and Capture, Play movie, Start Capture, Snapshot, Finish.
Option: Hit on" option" button, there are two choices: Performance testing and Stopped frame.
① Click "Performance testing", interface below for you to set the working folder will pop up. Set the working folder or just keep the default. To guarantee an accurate result, you are suggested to interact with the flash when it asks you to.
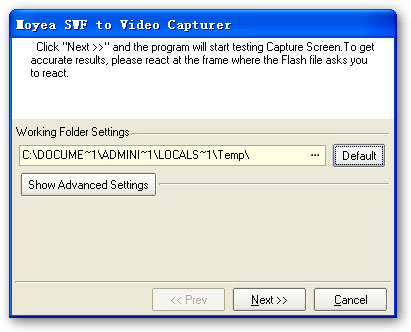
Click" Next>>", a bar showing the progress of performance testing appears. After the performance testing finished, the interface below for you to set the screen capturing speed pops up. Set the speed, or just keep the default. Check the "Mute while capture" box for silent capture. Click" OK" to finish the testing.
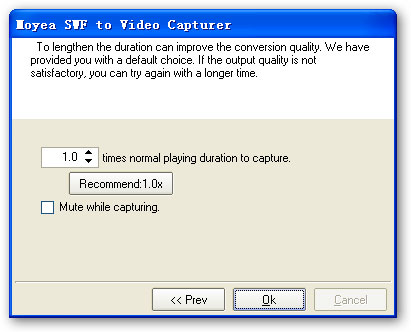
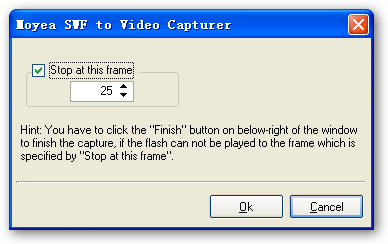
②Click " Stopped frame", the interface below will pop up. Check to" Stop at this frame" and set the frame, then program will stop capturing at this frame.
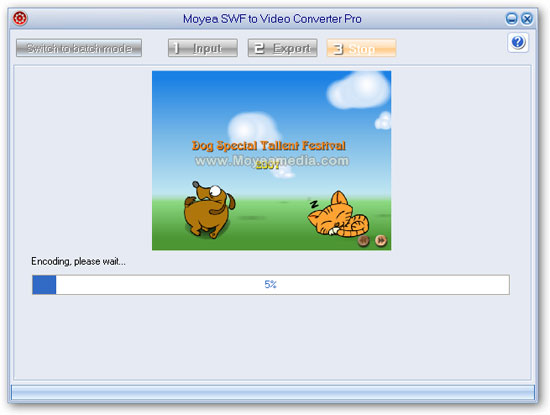
Then, the encoding process starts, and after a while, the conversion will complete. Confirm the "Conversion Success" and the output folder will pop up automatically, then we have a 32-bit RGBA AVI video file generated from the SWF file. Now the rest is to import it to the Adobe Premiere for advanced editing.
You May Also Be Interested in These Items
 Moyea SWF to Video Converter Std
 Total Flash SWF to Video Converter Solution for common users! Learn More...
Price: $69.95
 Moyea SWF to Video Converter Pro
The best & the only SWF Converter solution for professionals! Learn More...
Price: $99.95
